Show:
How to Use MySQL Data Migration Tool
January 3, 2023
 Programming
MySQL database migration is an important step either to transfer all the data to a new server or to deploy data to a test server. You can even migrate the database after cloning it for running reports. What we will do is to backup the data to an initial server, then migrate it to a target server and lastly restore the backup to MySQL. A robust and efficient data migration facility is also provided by the dbForge Studio for MySQL. In MySQL databases, we can migrate databases to different as well as the same instance. In the command line interface, we use the mysqldump to have a backup, retrieve or migrate database between different servers.

Introduction to MySQL migration
Often migrating the backup data to the other servers is a critical task, especially when it comes to business related databases. MySQL database migration is important as it removes the headache of manual maintenance of data. To transfer or migrate data, we can choose any way between the below mentioned features.
- Import and Export data
- Copying the database
- Backup and restore the data
Prerequisite to Data Migration → Before we start migrating the MySQL database, we need to make sure that
- We have the database privileges and rights.
- On the target server, copy with the exact same name of the database.
- The target MySQL database has an equivalent or higher version than the source instance.
The data migration process can be done on the following list of databases like MySQL or MariaDB and Cloud servers like Amazon RDS, Oracle Cloud, Microsoft Azure or Heroku.
The best ways to Migrate MySQL database
To migrate a MySQL database between the servers, we need to do three basic steps.
Part 1: Backup the data using the MySQL dump
Before you start migrating the data, you need to back up the database to a new virtual private server. This can be done using the mysqldump command.
mysqldump -u [username/root] -p –opt [name of database] > MySQLfile.sql
It might be a case that the remote server has the database, so you need to sign in via with -h (host) and -P (port) options or ssh within the system.
mysqldump -P -h -u [username/root] -p [name of database] > MySQLfile.sql
We also use this command in various other situations like for example.
i. Backing up multiple databases:
To dump multiple databases using the dump command, you can use the –databases command.
mysqldump -u [username/root] -p –databases [name of database1] [name of database2] > MySQLfile.sql
To dump all the databases on MySQL current instance, you can use the -all-databases command.
mysqldump -u [username/root] -p –all-databases > MySQLfile.sql
ii. Specific Table Backup:
In section (i), all the tables inside the database get dumped. If you want to dump any specific tables inside the database, then you need to write the table name after mentioning the database instance.
mysqldump -u [username/root] -p [name of database] [tableName1] [tableName2] > MySQLfile.sql
iii. Backup Data with Custom Query:
If you want to backup a specific data, you need to write a custom MySQL query. To dump a specific data, you use the WHERE clause query in the command line.
mysqldump -u [username/root] -p [name of database] [tableName1] –where=”WHERE CLAUSE” > MySQLfile.sql
Part 2: Copy the Database to the Target Server
After following the previous step, once you created the database dump, you need to transfer the dump to the target server. Copy your dump to in any way possible, for example, FTP, SCP or others.
Part 3: Database Dump Restore
This is the last step in migrating the MySQL database, where you import or restore the dump database. MySQL also provides a command to directly import or restore the data to MySQL. To use the command, we can follow this syntax.
mysql -u [username/root] -p [name of database] < [MySQLdumpFile].sql
How to use dbForge Studio for MySQL database migration
One way to backup the database is to restore it on a target database. You need to follow the below mentioned steps to migrate the database.
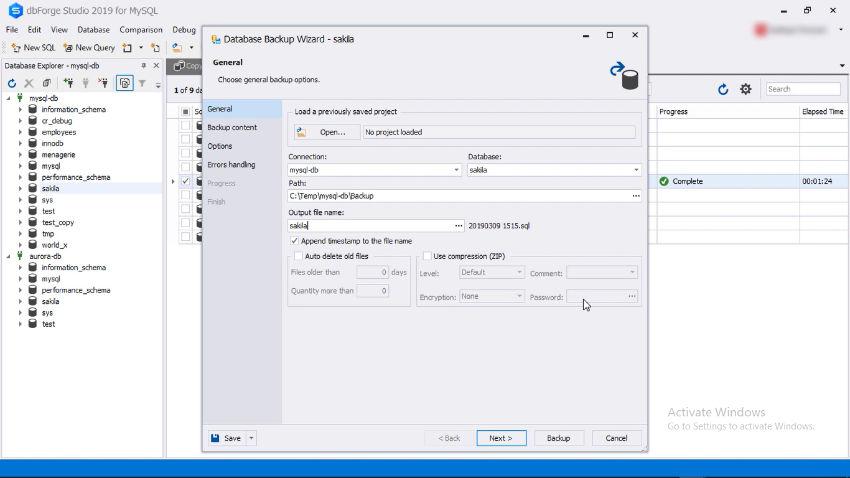
Step 1: Open the dbForge Studio for MySQL, click on Database → Backup and Restore → Backup Database. This opens the database wizard options,
- Connection: to source instance,
- Database: select the backup database,
- Path: provide the path to backup folder
- Output file name (optional): can be assigned by database, if empty
We can also add a timestamp to delete the backup after an expiry period. Also, can compress, encrypt and protect backup files with a password. Press Next,

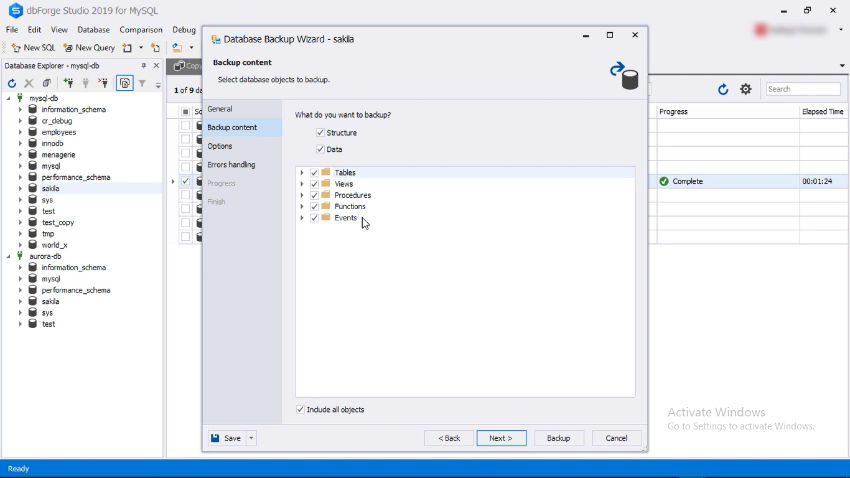
Step 2: Leave the backup content as it is and Press Next again,
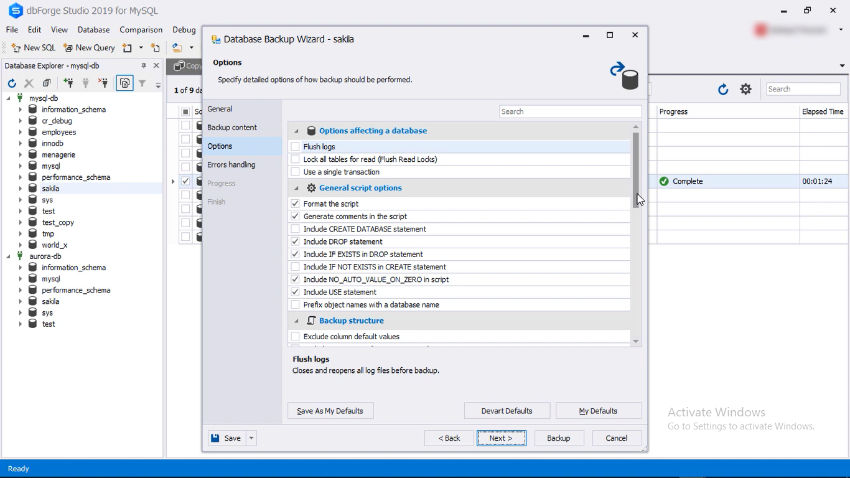
Step 3: In this step, we have multiple options, which can left as it is and Press Next,
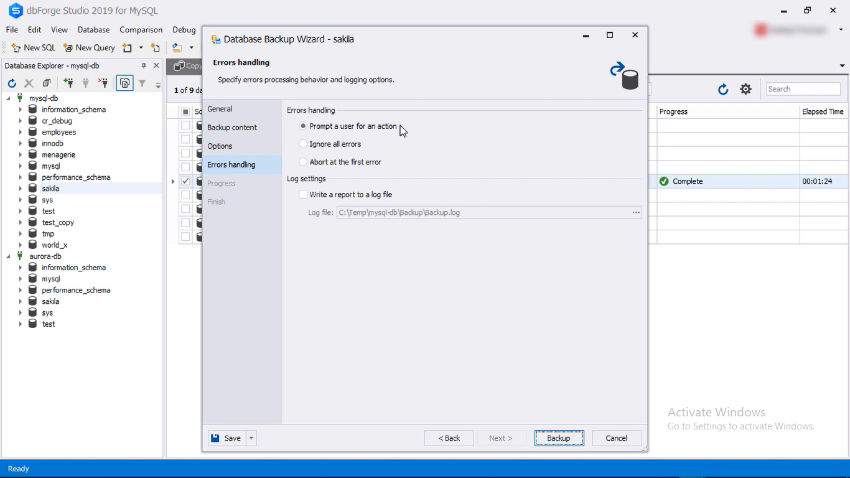
Step 4: Error handling screen allows us to choose how we can handle errors when there is an exception during a backup and then Press Backup.
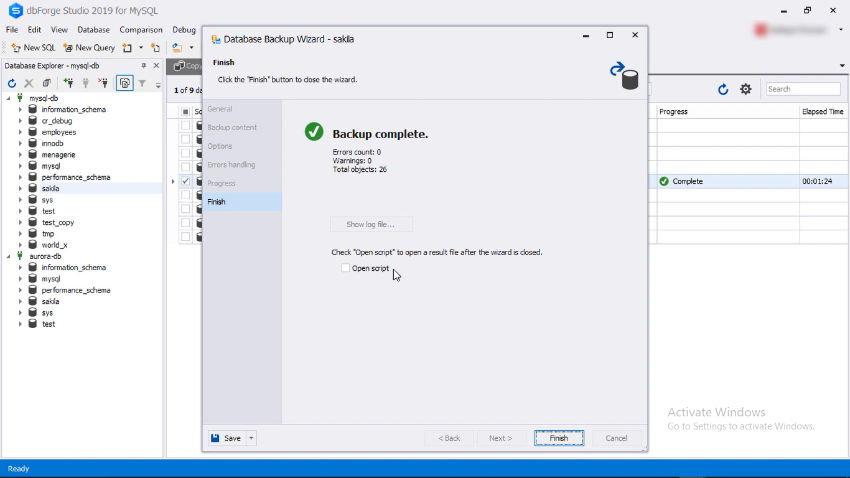
Step 5: Once the backup is successful, it shows the message and allows us to open the script for results after the wizard is closed. Press the Finish button to complete the process.
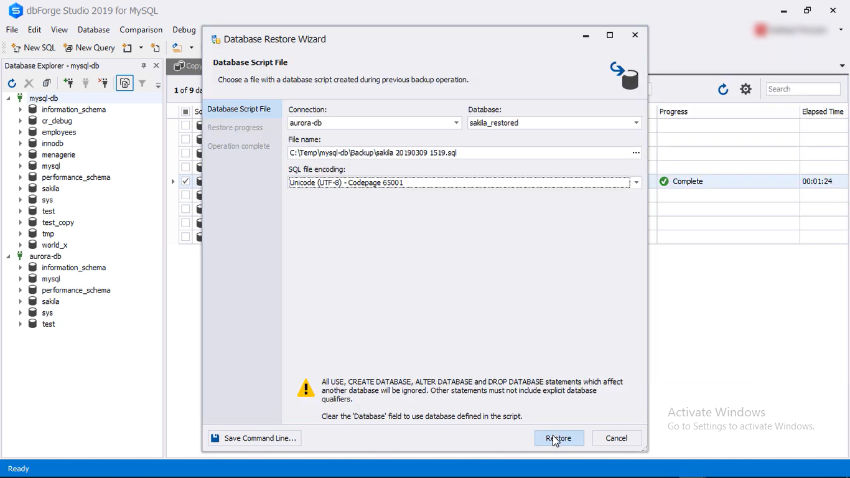
Step 6: Go to the backup folder and you can see MySQL has created a sql file. To restore this file, again go back to dbForge Studio for MySQL, select Database and Backup and Restore → Restore Database. It will open the Database restore wizard in front of you.
Step 7: Select the connection, new restored database name and select the backup database file from the folder and press Restore.
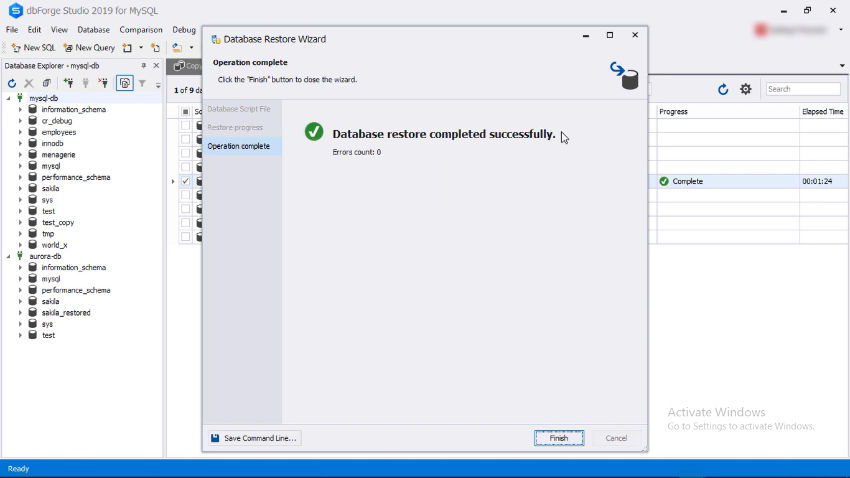
Once you follow the process correctly, it shows the database restore completed successfully message on the screen.
Summary
You can see that dbForge Studio for MySQL has robust and effective database migration techniques for different situations and scenarios. The easiest way to move the database is to use built-in Copy database feature, which requires just a few clicks to finish the backup.
 Return to Previous Page