Show:
How to Create an eLearning Course in 7 Steps
April 11, 2022
 Business
The eLearning market has been one of the most rapidly growing fields in the last few years. And reports show that it will grow even more, reaching a total size of $457.8 billion by 2026. For current eLearning professionals and those who will start out in this field, it means that they’ll have great opportunities and multiple exciting projects.

If you want to get up and running in the eLearning world as an instructional designer, you need to be able to create engaging online courses. This might be pretty challenging if you don’t have any experience or tech skills. However, there are fast tracks, tips, and easy-to-use tools that might help you achieve fascinating results right from the get-go. Check out our guide if you want to start creating captivating eLearning courses in no time:
1. Define Training Objectives
What do you want your trainees to be able to do after completing the course? That is the question you should answer to determine your training objectives. Please note that all of them should be result-oriented and specific. For example, if you formulate your objective as “an employee should be able to sell more products,” the outcome will be pretty vivid and hard to assess. However, if you state it as “an employee should be able to double sales after finishing the training program,” you’ll get a solid criterion for measuring the effectiveness and success of your course.
2. Identify Your Audience
Imagine that you need to explain what a power plant is. Let’s say your audience is children. You might go with something like “a power plant is something that gives us energy.” Now, what if your trainees aren’t children but car power plant workers? The explanation would be totally different. The audience affects the way you present the materials significantly. So, you need to know your trainees really well. Consider at least these factors when developing an eLearning course:
- Age
- Language
- Subject expertise level
- Digital literacy
- Other factors that might influence the way to present the subject
3. Choose an eLearning Authoring Tool
To create an eLearning course, you’ll need an authoring tool. There are hundreds of options available. You can start looking for the best fit by exploring the 10 best authoring tools in the industry. Each of them has its specific features and focus. Some work great for video recording and editing; some are perfect for designing VR content; some let you code your course almost any way you like, etc.
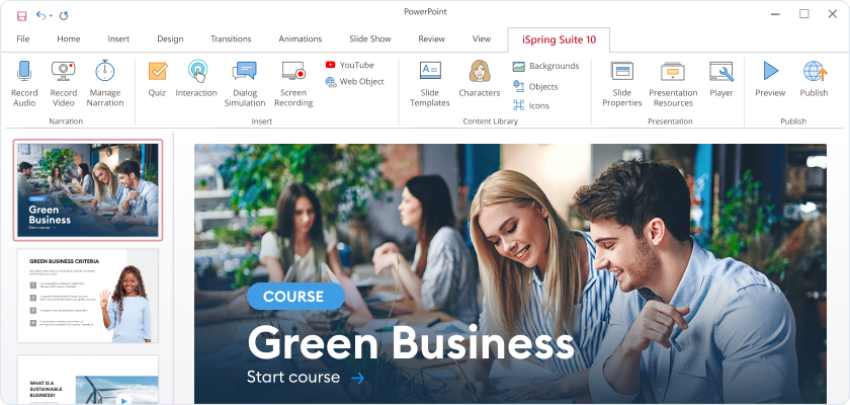
We’ll choose iSpring Suite because this tool is the best solution for beginners. iSpring Suite is easy to use and lets you create online courses, quizzes, video lectures, and role-plays fast without any coding. It also offers Content Library, with ready-made slide templates, characters, locations, and other eLearning assets you may need for your course. So, even if you have no visual design skills, your courses will look professional with iSpring Suite, and you won’t spend much time on content creation.
4. Research the Topic
There are many ways to research a topic for your course, from conducting online research to working with subject matter experts. The main point is to get a thorough understanding of the subject. So, try different resources, and don’t stop until you know every aspect of the issue you’re creating an eLearning course on.
5. Map Out Your Course
Having a plan is always a good idea. But in eLearning projects, it’s more of a must. Before creating content for your course, you need to know precisely what you need, when you need it, and where. Instructional designers call this ‘plan’ a storyboard.
A storyboard is a document that contains the framework of your course. Here’s what you can include in it:
- Slide title
- Screen text
- Infographics, photos, charts, videos, and animations
- Course navigation
- Branching (if you create individual learning tracks)
- Audio narration script
Write down your storyboard and prepare all the assets you’ll need in the development phase. If you have a large quantity of materials for your course, consider breaking them into smaller modules. Your training will be more effective and engaging if you follow one of the main eLearning rules: one lesson – one skill.
6. Create the eLearning Content
Your topic has now been researched and the course is laid out. So, you’re ready to design the course itself. Depending on your authoring tool, you can create various types of eLearning content. Let’s take a look at the 5 most popular types of content that you can design with iSpring Suite:

- Information slides
Select one of 2,200 ready-made slide templates from the iSpring Content Library and enter your texts. All templates were created by professional graphic designers, so you can be confident that your course will look attractive and tidy.
- Interactions (timelines, FAQs, catalogs, etc.)
To make your course more engaging, let trainees interact with the course content. The easiest way to do this is by using iSpring’s ready-made interaction templates. Select the one you like the most, add texts and images (if needed), and your interaction is ready.
- A video module
People love videos, so it would be a great idea to use this format in your course. With an authoring tool like iSpring Suite, you can record your screen, camera, or picture-in-picture videos and edit them in the built-in video studio.
- A quiz
Knowledge checks are essential for assessing how well trainees have acquired new knowledge and skills. Build a quiz from 14 ready-made question types, from multiple-choice and true/false questions to drag-and-drops and hot spots.
- A role-play
If you need to train communication skills, an interactive role-play is a great way to do that. Typically, you’d need to code such role-plays in an authoring tool, but iSpring Suite allows you to do this much more easily. Just select characters and locations from Content Library, insert phrases and answer options, and create scenarios in an intuitive drag-and-drop interface.
7. Assemble the Modules and Publish Your Course
Once you’ve created all the content you need, put the pieces together and publish your course. With iSpring Suite, you can publish your course in any format you need (SCORM, xAPI, HTML5, MP4, and others). The course will automatically adapt to any screen size, so trainees can take it from their laptops, smartphones, and tablets – and the course will look equally great on any of them.
And that’s it. Congrats! Your first eLearning course is ready. Now, you can upload it to your LMS or share it with your learners any way you prefer.
 Return to Previous Page